¶ Kiosk Error Screens
The basic error screens on a Redbox have different color backgrounds, indicating the problem at a basic level. Credits to @mordanthanus in the Discord for posting this info.
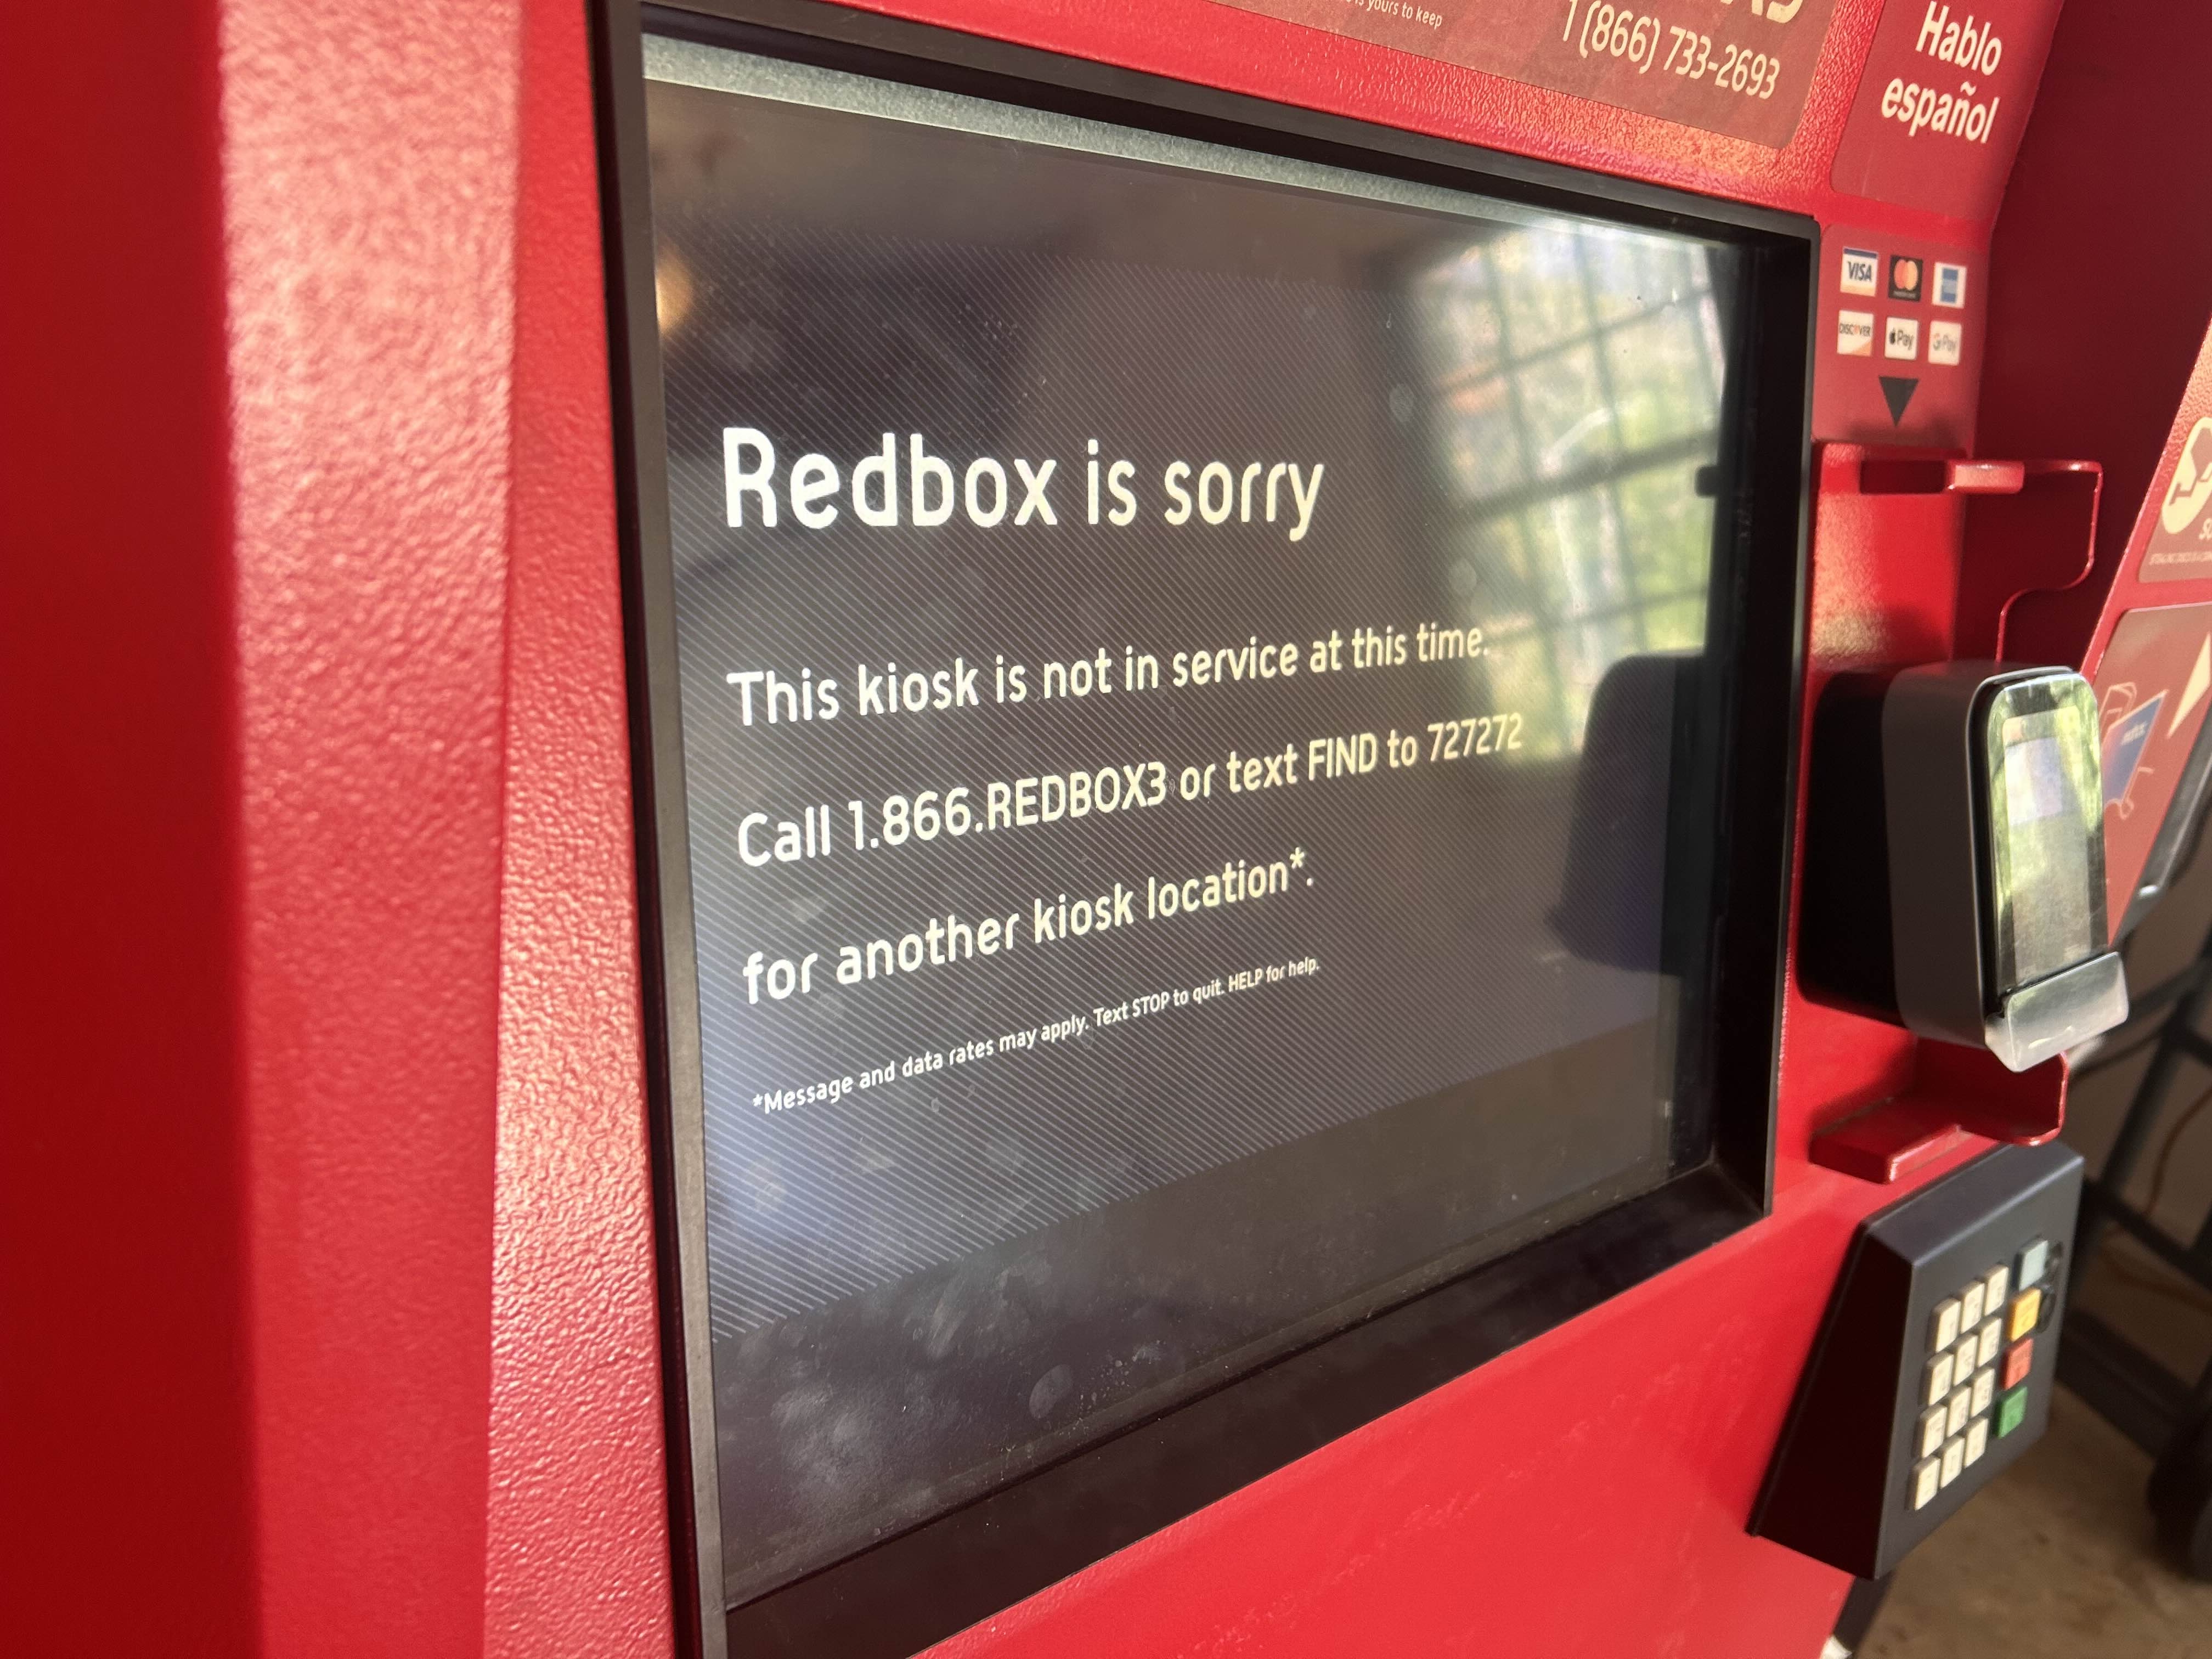
- Black with white text – Kiosk is booting or updating. Black screens automatically clear themselves when completed, usually 5-15 minutes. Watchdog must be turned on for this screen to disappear. Watchdog can be turned on or off through the Redbox Desktop.
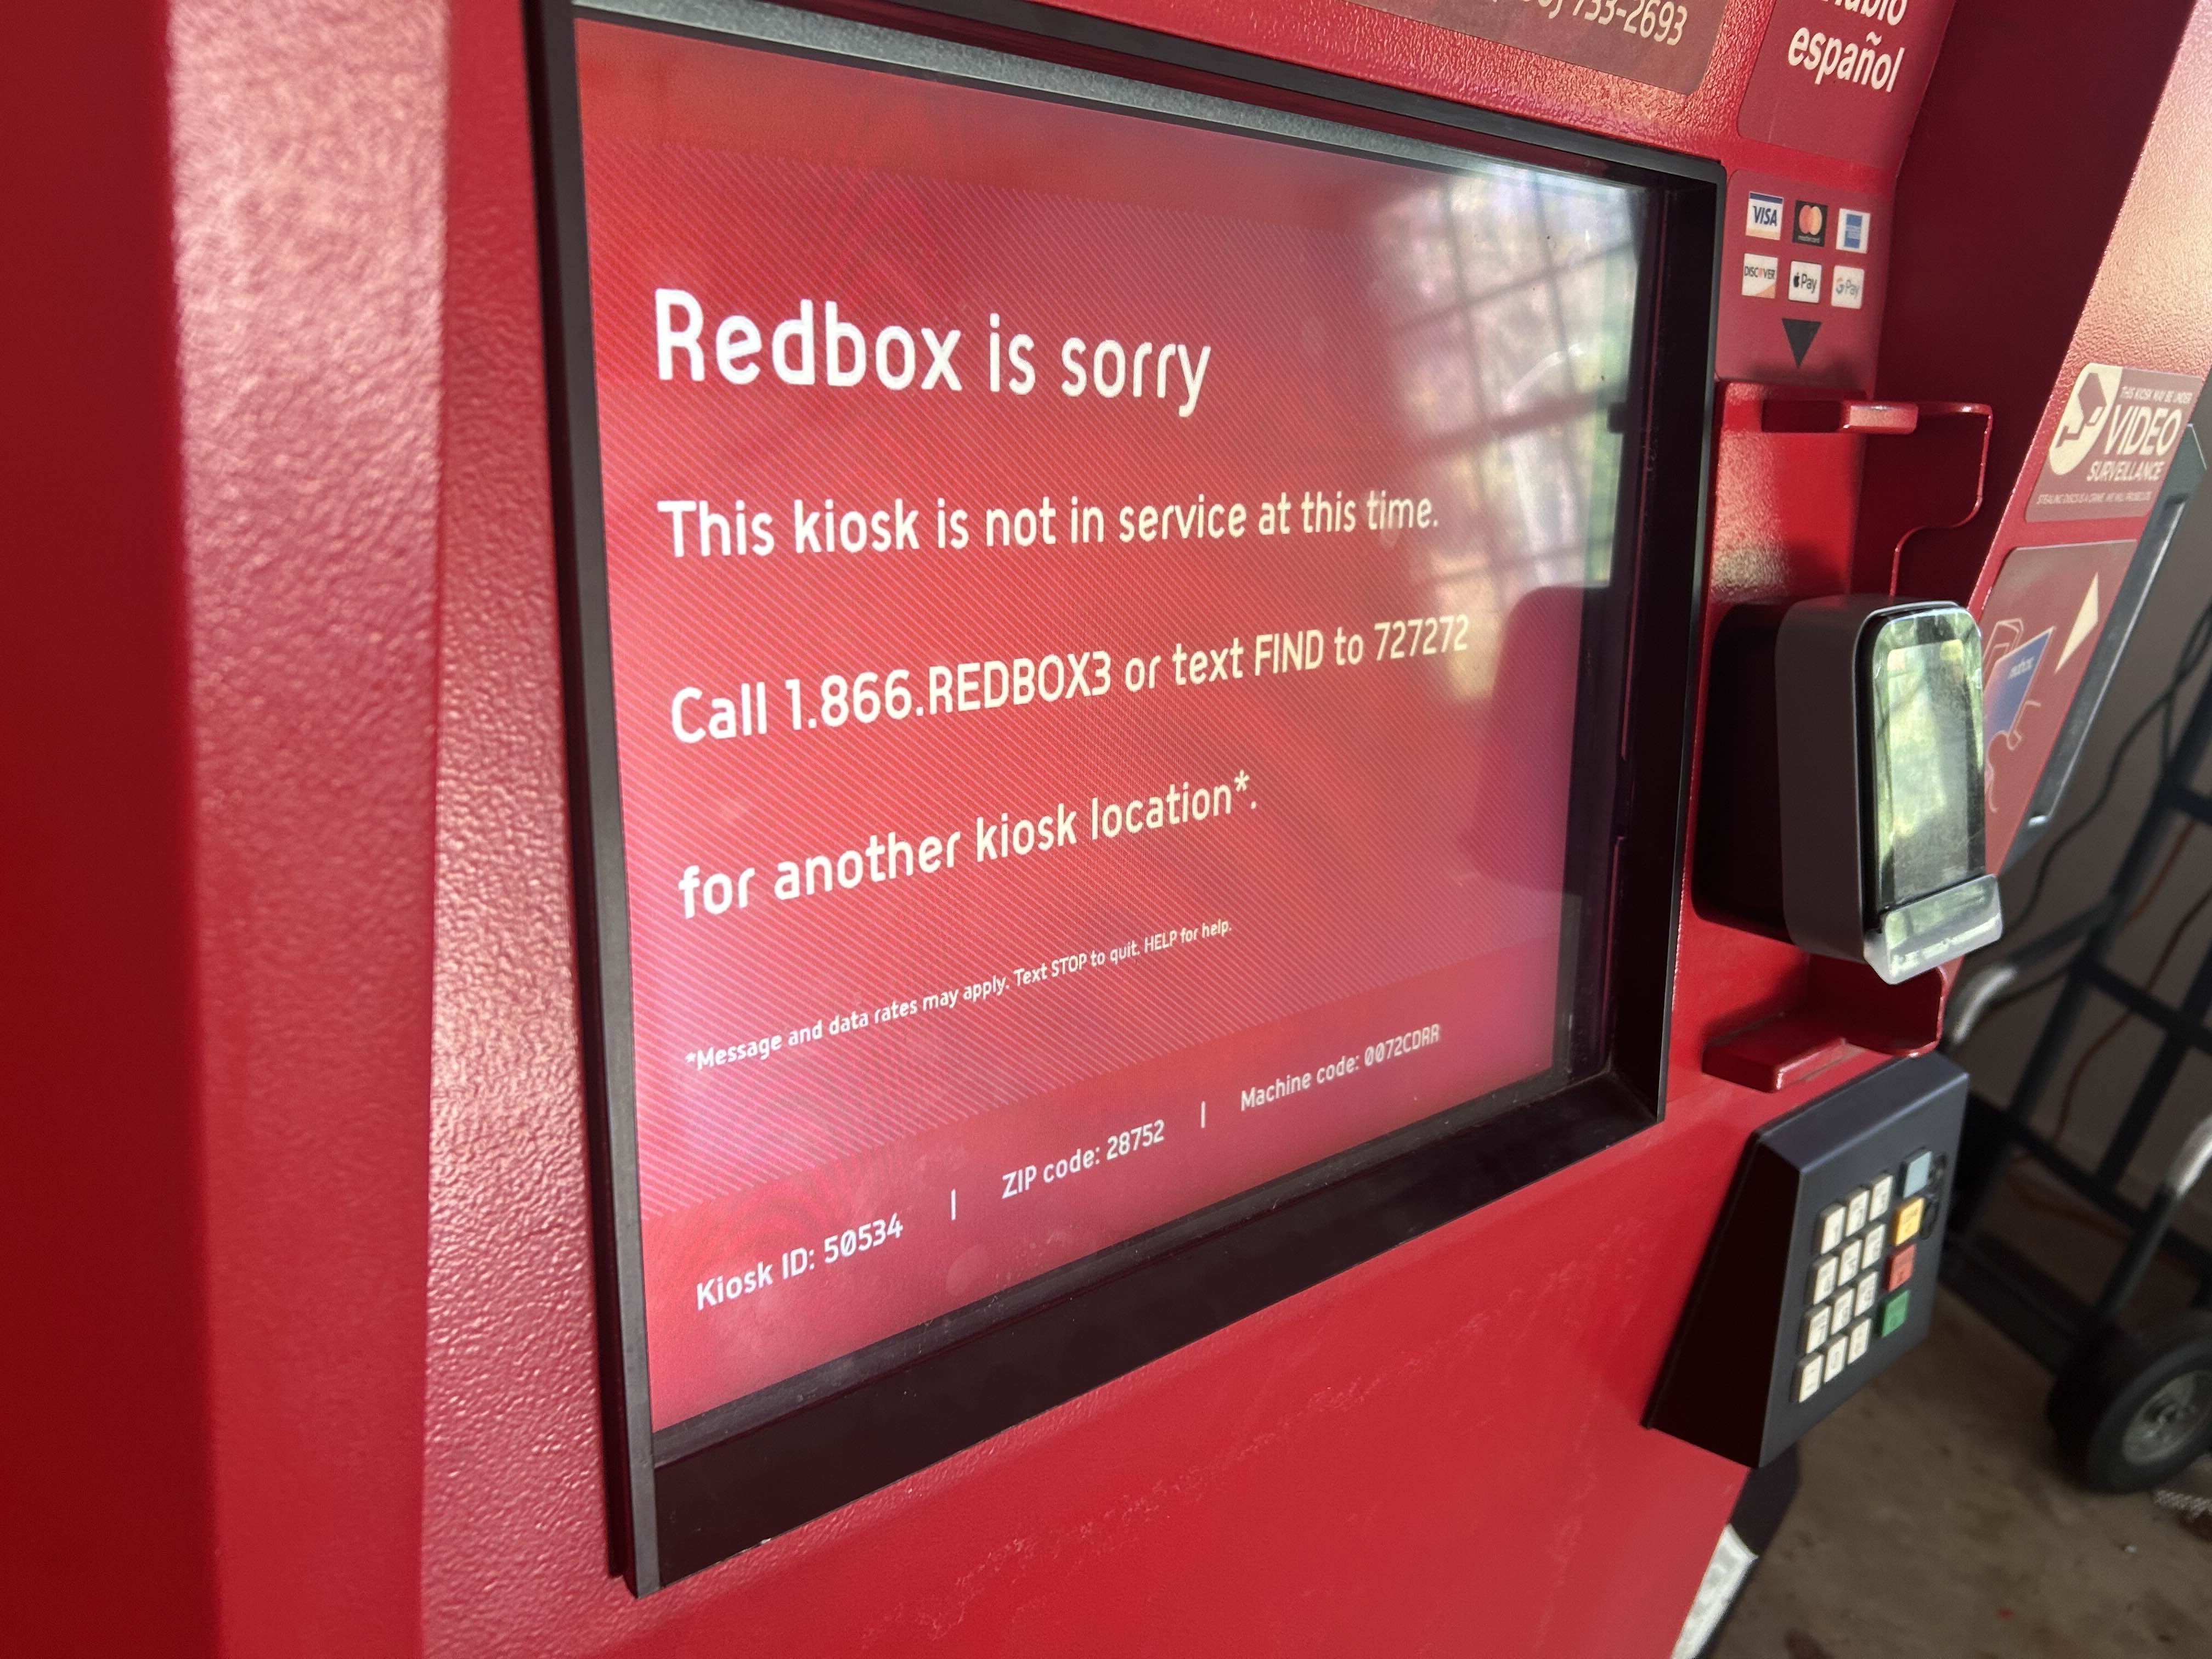
- Red with white text – Machine error alert. Check error codes further down on the page. Generally requires human intervention but may fix itself during an overnight reboot.
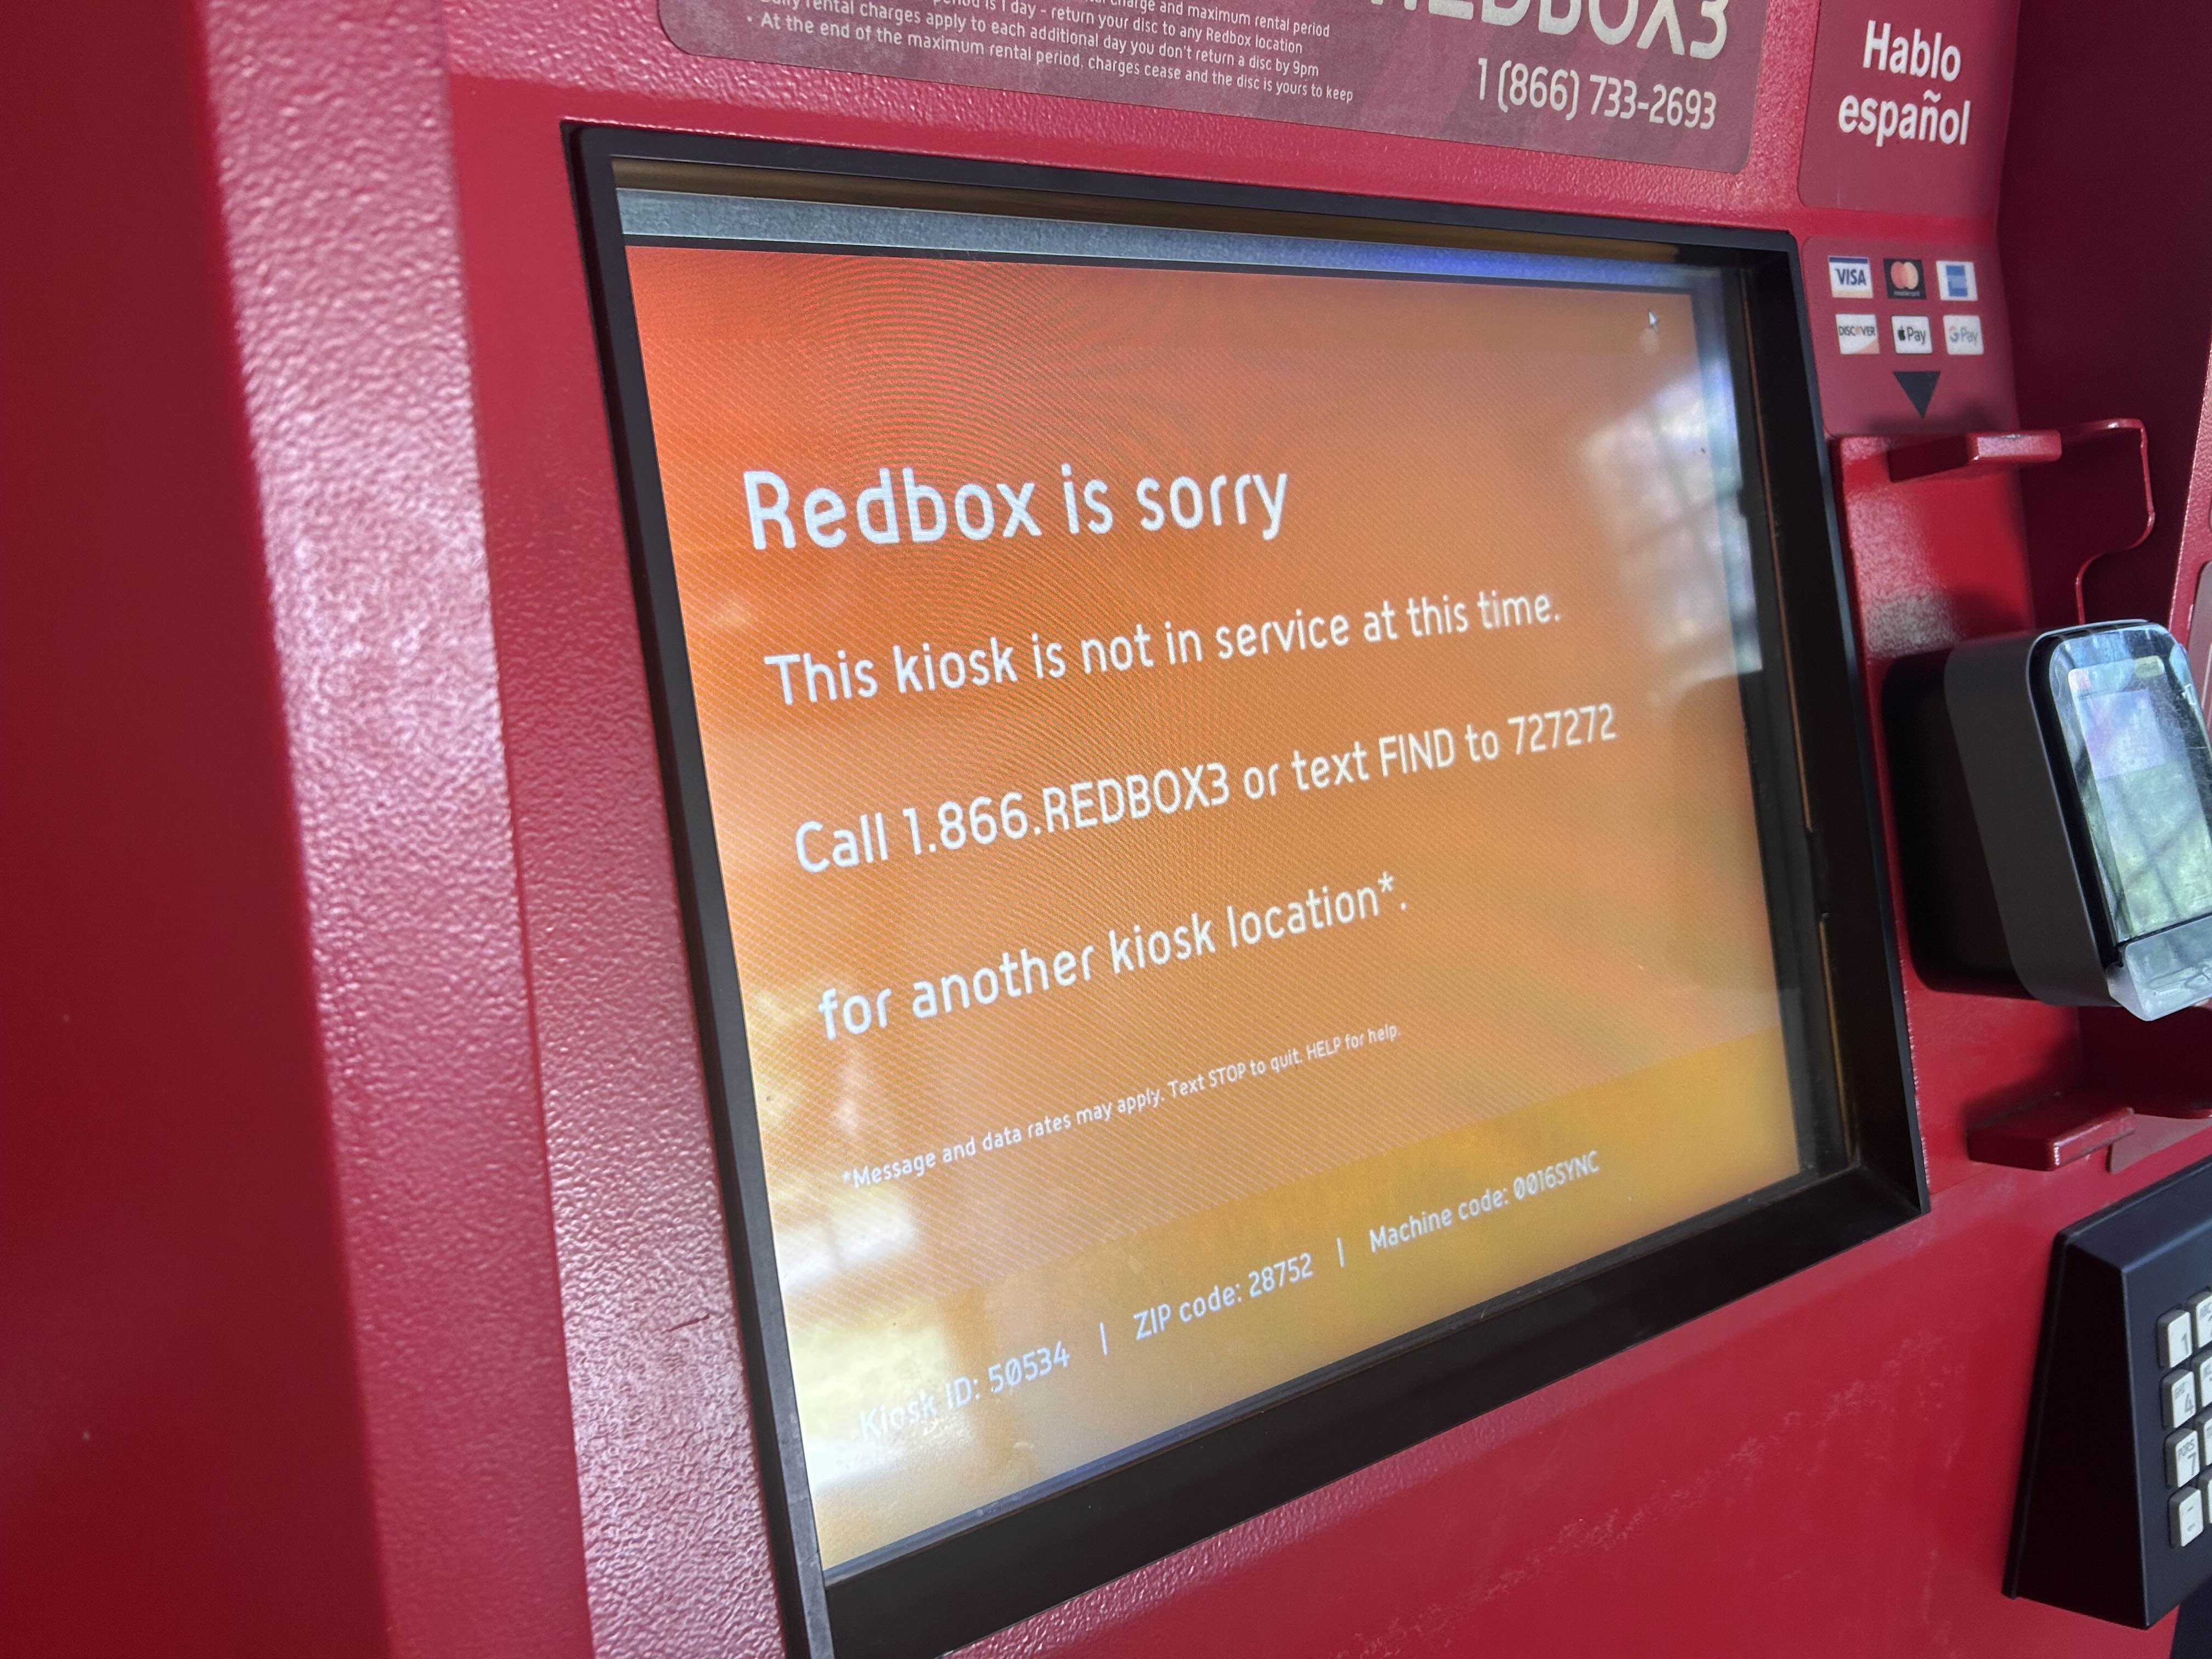
- Orange with white text – Kiosk is conducting a partial or full maintenance sync and will reboot to customer screen when complete.
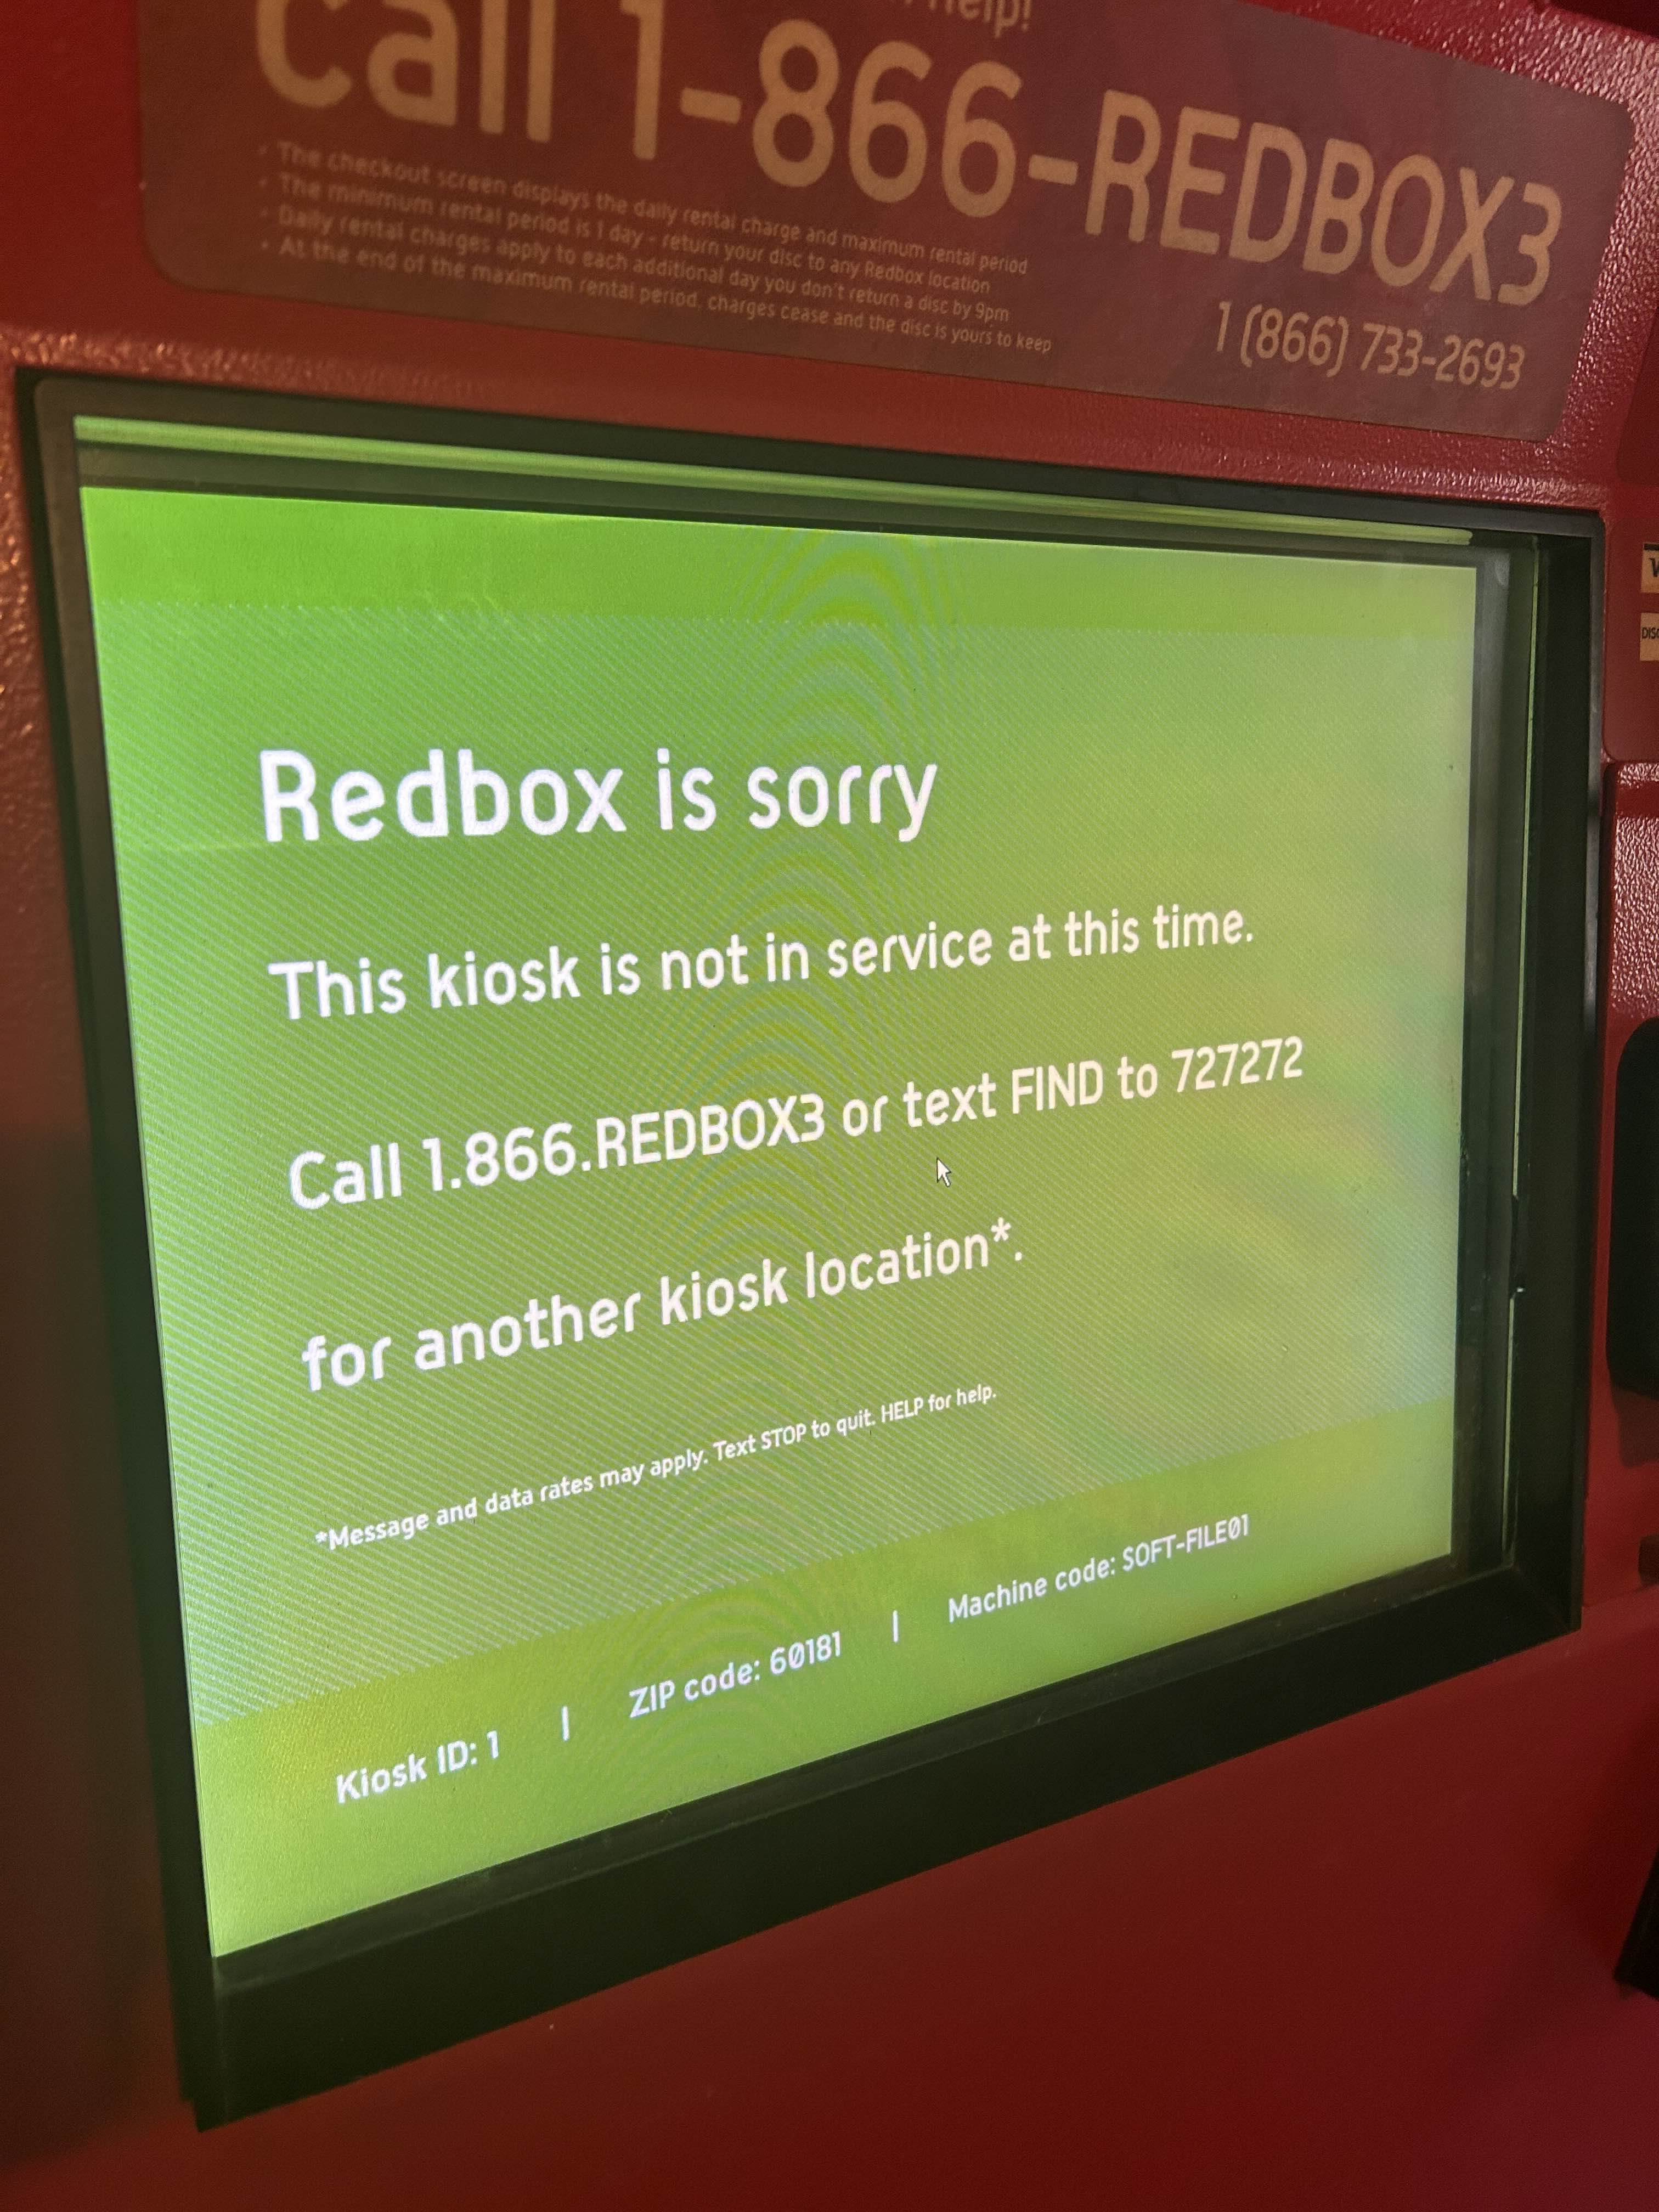
- Green with white text – The kiosk engine reports a database access error and places kiosk into maintenance mode. SOFTFILE0x errors.
Below are pictures of the error screens. Credits to @.jandajanda for these pics also posted in the Discord
¶ Kiosk Error Codes
These error codes show on screen in maintenance mode. Credits to @mordanthanus in the Discord for posting this info.
¶ 0073CDRR
- MS will always dispatch these due to an EMV error.
Solution:
Check EMV USB Connection/Device. If the cable or device is damaged, a replacement is required.
¶ 0099CDRR
- Indication that the EMV has failed or been tampered with. Plan on bringing one with you. Alert Irruptions are not field repairable.
Solution:
You will need to remove the EMV reader and cover the port and setup EMV Emulation (requires patched dll and registry edit) or source another Card Reader from another Redbox.
¶ 0072CDRR
- EMV disconnected. If a remote reboot doesn’t fix it, a visit is needed.
Solution:
Check the USB cable for wear. If the USB cable is damaged, you will need to replace the USB cable. Also check your PC to see if the driver is working correctly. If it has failed, you will need to reinstall the drivers.
¶ 0096KRNL
- Kiosk Engine has put up the maintenance view directly
Solution:
You will need to get into Field Maintenance or System Registry to disable this (requires patching the dll to get around login issue)
¶ 005PMXA
- Put away max attempts exceeded
Solution:
Perform Inventory Sync/Re-initialize the kiosk.
¶ 0128VNDR
- Vend door error
Solution:
Check vend door board. If there is no power going to the board and the board is not damaged, you will need to replace the ribbon cable or cut a new length.
¶ INITSYNC
- Initial Sync is currently running
Solution:
Should go away automatically once Init Sync is completed.
¶ 001ISTG
- ItemStuckInGripper returned by HAL during vend or return
Solution:
Check Track bands. If they are dried out/brittle, you will need to replace them with new track bands.
¶ 002OBDT
- ObstructionDetected returned by HAL during vend or return
Solution:
Most cases its dirty sensors. Clean all sensors on the gripper and make sure the gripper basket is not loose on the left side. If its leaning and not straight, you will need to tighten the bottom screws before continuing. Use HAL Tester to verify no sensors are lit up.
¶ 003CCFA
- CameraCaptureFailure returned by HAL during vend or return
Solution:
Check Camera devices to make sure they are connected properly. If the USB cable is damaged, you will need to replace it. If the camera is connected, but the driver shows errors, you will need to reinstall the camera drivers. For 5th Generation Barcode Scanner, you will need to make sure in hal.xml and make sure SnapDecodePort is set to the correct COM Port. For the 3rd/4th Generation Cameras, you will need to make sure the camera can see and read the barcode. You can configure this in HAL Tester until the code is readable. Avoid plugging in additional cameras as Redbox software will prioritize those first.
¶ 004MACH
- MachineError returned by HAL during vend
Solution:
Check to make sure the gripper is not obstructed. If so, follow solutions for error codes 001ISTG, 0020BDT, and 006MVFA.
¶ 006MVFA
- MoveFailure returned by HAL during vend
Solution:
Check motors. If the motors has play when powered on, motor replacement is required. If the motors are not moving when powered on, you will need to make sure the kiosk is not tilting on one side. If the motors are stiff while disconnected from power, replacements are required.
¶ 0032RSVB
- Reservation pickup could not find the reserved barcodes in stock
Solution:
Required contacting Redbox Customer Support when they are in operation. 1-866-REDBOX3 as of December of 2024 is no longer in service. They would direct you to another kiosk in the area that has the exact title in stock. If you are at a retailer with more than one kiosk at the location, you would need to check the other kiosk(s) at the location.
¶ RPCSSM
- Session closed to show maintenance during a return
Solution:
Follow error code 0096KRNL.
¶ 0048PPBE
- Preposition Picker Basket Empty during checkout
Solution:
Follow error code 001ISTG. If same error occurs, check error code 005PMXA.
¶ 0064SCBE
- Shopping Cart Basket Empty during vend
Solution:
Follow error code 0048PPBE.
¶ HALSVCNR
- HAL Services are not running.
Solution:
Start service in Redbox Control Panel or in the Services application. If an error occurs while starting HAL Service, check that there is no errors in hal.xml.
¶ HALSTS-043
- One of the following conditions are met:
1) The Door is open and the two door sensors (switches) are not pressed in.
2) Gripper Obstructed (Fingers not retracted, Track not Closed, Sensors 1 or 6 on)
3) Motion Controller Communication error (unable to communicate to Arcus/Proteus)
4) Door sensors aren’t properly closed, or someone opened the kiosk while the picker or drum was moving.
Solution:
1) Check Door Sensor Switches. If they are damaged, you will need to replace them.
2) Read solution in error code 001ISTG
3) Check the USB cable between the PC and Arcus/Protheus Boards. If there is no power, check all cables to make sure they are not loose. If the issue still occurs, a replacement is needed. If the cables are damaged, only solution is to source from another kiosk. You can test is the boards are responsive in HAL Tester.
4) Close the door or pull the switch pins on both sides if you are diagnosing an issue with the kiosk.
¶ SOFT-FILE01
- The kiosk engine reports a database access error and places the kiosk into maintenance mode. *If the error persists, send it to Level 2 for possible software support escalation.
Solution:
Try restarting the kiosk engine. If that doesn't work, you will need to source the HALCounters.vdb3, HALData.vdb3, cache.data, profile.data, local.data, and inventory.data from another working kiosk.
¶ SOFT-FILE02
- The kiosk engine reports a database access error and places the kiosk into maintenance mode. *SOFTFILE_02 errors should be sent directly to Software support by Level 1
Solution:
Read solution in error code SOFT-FILE01
¶ SOFT-FILE03
- The kiosk engine reports a database access error and places the kiosk into maintenance mode. Send to level 2 for possible software support escalation.
Solution:
Read solution in error code SOFT-FILE01
¶ 0016SYNC
- Occurs when Maintenance Inventory Sync is performed
Solution:
Wait until Maintenance Inventory Sync is completed. Screen will go away once it's completed.
¶ CCF
- Camera Capture Failure.
Solution:
Read solution in error code 003CCFA
¶ Locked Out of Redbox Account
It's common for some people to get locked out of the Administrator account on their Windows 7 OS (usually named Rbuser). This usually occurs when you enter incorrect credentials, but can happen for a variety of other reasons. To log back into your kiosk, you'll need to reset the password first. Unfortunately, this fix isn't simple and will require some technical knowledge.
In order to reset your password, you'll need to have a USB Drive and access to BIOS on your kiosk. If you boot into BIOS and are greeted with a password screen, you'll need to reset your CMOS first. You can do this by removing your computer from the Redbox kiosk, opening the side panel, and removing the CMOS battery (then putting it back in after 5 seconds). The CMOS battery is a CR2032 located on the motherboard. Although it isn't required, it's highly recommended that you replace the battery before further usage to prevent issues further on. Before you do anything, make sure that your computer is completely unplugged. A potential electrical shock is not worth the risk.
Once you've reset your CMOS and plugged in your machine, it's time to create a bootable USB stick. To do this, visit this page and follow the instructions to download the latest release and create a bootable USB. This can be done using a CD or floppy disk as well, but you'll need to boot from it on the Redbox computer. When you insert your bootable USB, power on your computer and enter BIOS (depending on your computer, this can usually be done by holding down the F1/F2/F12/DEL key). Select your USB stick to boot with it, and follow the instructions on the screen to reset your password (the default selections are usually the correct ones, but always read before you click).
Finally, remove your USB stick and boot your computer as normal. You should be able to enter without issues, and your kiosk is restored. Congratulations!
¶ Changing your Administrator Password
If you've experienced being locked out of your Redbox account, it might be a good idea to update your administrator password. This process is straightforward, and it'll prevent these issues from happening again. To do this, open Command Prompt and run the following command to update the password:
net user Rbuser <enter your password here>
If you see a success message appear on-screen, you've done this step correctly! Next, you'll need to update the password on the system so it automatically boots without password entry. This step is highly recommend, and skipping it will result in future complications. If you'd like to continue, open your File Explorer and navigate to C:\Program Files\Redbox\REDS\Installers\KioskAdmin.zip and unzip this file. Then, launch the Autologon.exe and replace the credentials with the new password that was set. After you do this, restart your machine to confirm that the changes were made, and that's it.
¶ Powering On a Redbox Kiosk Computer After a BIOS Reset
Redbox kiosk computers are configured to automatically power on when connected to a power source (autoboot). However, if the BIOS is reset—whether from a manual reset or due to a CMOS battery failure—this autoboot setting will revert to its default state and become disabled. After this, the computer will require a manual power-on each time until the autoboot setting is re-enabled in the BIOS.
¶ Locating the Power Button on Premio Computers
On Premio computers, the power button is discreet and may not be immediately visible. It is located on the back of the unit, near the I/O panel. Look for a small button close to the I/O LEDs (typically used to indicate network or drive activity). Pressing this button will power on the computer, allowing access to the BIOS to re-enable the autoboot setting if needed.
Note: Once the autoboot on power setting is re-enabled in the BIOS, the computer should resume automatic boot-up on power connection, as originally configured.
¶ Kiosk Not Showing Titles
If the Start screen is blank (no carousel with titles), and no titles are shown on the Rental screen, you may have accidentally “closed” your kiosk. This setting is found in the Redbox Desktop and clears the inventory in the kiosk, resulting in no products being in stock. To resolve this, login to Field Maintenance and look for the Inventory Sync option. This will allow you to schedule a sync of your inventory, which usually takes about 3-4 hours to complete. After the sync is complete, you should be able to view your available titles.
¶ Unable to rent a Movie/Game Title unless its removed from cart
This occurs when a title hasn’t been released to Redbox, coming soon titles like Twister, or is marked Do Not Rent (DNR). If you take the kiosk with you, you’d need to update the database by setting the release date to 0 and the DNR date to null for the specific title (the field accepts null and typically stores when a title becomes unrentable; these values are usually governed by Redbox’s studio contracts).
If you restore game functionality with patches, most titles will also require their DNR dates to be cleared to allow game rentals though some game patches have gotten around this restrictions and works for movie titles as well.
¶ Kiosk Not Showing Titles Despite Having Inventory
If the Start screen is blank (no carousel with titles), and the Rental screen is not showing any titles (except for replacement cases) despite having inventory data, this is likely because of an incorrect date and time on your kiosk's computer. This often happens after resetting your CMOS, likely because the system date is cleared. If you've disconnected your kiosk from the internet, your computer won't be able to get the correct date and time for your time zone, hence why it's set to an old date (like 2009). Luckily, the fix is easy: just enter your Date and Time settings and manually update the information. Then, restart your kiosk, and you should be good to go!
¶ “CAMERA CAPTURE error. I'm sorry!”
Make sure you have the correct drivers installed. If they are missing, you will need to install the correct Camera Software from the Windows 7 or Windows 10 Redbox Technician Driver Kit, which can be sourced here.
You may encounter issues with the camera, despite it being connected, recognized by windows and having drivers installed.
You may also see the error “CAMERA CAPTURE error. I'm sorry!” in HAL Tester console, and the camera preview is blank. This is usually an issue with incorrect camera settings for the kiosk software.
To fix this, open C:\Program Files\Redbox\halservice\bin\hal.xml in a text editor, find the line starting with <ScannerService>, and change it to one of the following:
Gen 3 and Gen 4 Camera
  <Camera>
   <CameraPlugin>DirectShowFrame</CameraPlugin>
   <SnapDecodePort>NONE</SnapDecodePort>
   <WritePause>500</WritePause>
   <RebootOnStart>true</RebootOnStart>
   <EnableInfared>false</EnableInfared>
   <CycleCameraOnUse>False</CycleCameraOnUse>
   <UseInliteOnFail>True</UseInliteOnFail>
   <ScannerService>Legacy</ScannerService>
   <LogDetailedScan>False</LogDetailedScan>
   <InsertReadStats>true</InsertReadStats>
   <ExpectedCodes>4</ExpectedCodes>
   <ScanTimeout>2000</ScanTimeout>
   <ScannerWakeupPause>15000</ScannerWakeupPause>
   <FilterExcessReadCodes>True</FilterExcessReadCodes>
   <CortexPortOpenWait>50</CortexPortOpenWait>
   <CortexSnapOnDecodeFailure>False</CortexSnapOnDecodeFailure>
   <CortexPortBufferSize>8192</CortexPortBufferSize>
   <UseRuntimePath>False</UseRuntimePath>
   <UseCortexHDField>True</UseCortexHDField>
   <IRHardwareInstallDate>NONE</IRHardwareInstallDate>
   <UseInliteForFraudValidation>False</UseInliteForFraudValidation>
 </Camera>
Gen 5 Barcode Scanner
  <Camera>
   <CameraPlugin>DirectShowFrame</CameraPlugin>
   <SnapDecodePort>COM6</SnapDecodePort>  <!-- This is typically the COM port "USB to Virtual COM" port in Device Manager. If different, you must change it -->
   <WritePause>500</WritePause>
   <RebootOnStart>true</RebootOnStart>
   <EnableInfared>false</EnableInfared>
   <CycleCameraOnUse>False</CycleCameraOnUse>
   <UseInliteOnFail>True</UseInliteOnFail>
   <ScannerService>Cortex</ScannerService>
   <LogDetailedScan>False</LogDetailedScan>
   <InsertReadStats>true</InsertReadStats>
   <ExpectedCodes>4</ExpectedCodes>
   <ScanTimeout>2000</ScanTimeout>
   <ScannerWakeupPause>15000</ScannerWakeupPause>
   <FilterExcessReadCodes>True</FilterExcessReadCodes>
   <CortexPortOpenWait>50</CortexPortOpenWait>
   <CortexSnapOnDecodeFailure>False</CortexSnapOnDecodeFailure>
   <CortexPortBufferSize>8192</CortexPortBufferSize>
   <UseRuntimePath>False</UseRuntimePath>
   <UseCortexHDField>True</UseCortexHDField>
   <IRHardwareInstallDate>NONE</IRHardwareInstallDate>
   <UseInliteForFraudValidation>False</UseInliteForFraudValidation>
   <CortexStartupAction>Decode</CortexStartupAction>
</Camera>If you are unsure what generation camera you have, try just flipping whatever the current setting.
After making the changes, save the file and restart the kiosk (or HAL Service if you prefer)
¶ Upon returning disc, it holds the disc hostage in the gripper
This issue occurs mostly in Windows10/11 64-bit as the AVEO drivers in the Technician Driver Kit are 32-bit and are not supported on 64-bit hardware.
To solve this, you will need to get the AVEO Drivers archived here, go to Device Manager, Select the Camera Device, press Update Driver, and select the folder that has the driver you just downloaded. Upon successful import, you will need to restart the PC for the device to be recognized properly by the Rental Application.
¶ Protheus COM device shows driver missing or error
You will need to move the Protheus COM Port to 10 or greater (Usually these are unused), than install the Arcus Driver from Windows 7 or 10 Technician Driver Kit. Once the driver shows in COM Ports that Protheus doesn't show errors and successfully installed, then run COM Shuffle script provided in the Technician Driver Kit and restart the kiosk PC for the correct COM Port to be provided (Usually COM3 or COM1)
¶ Gripper slams down when renting or returning
This likely means the external COM Port is failing. Switch to the on board COM Port (if provided) and go into HAL.xml to switch to the correct COM Port and restart HAL Service. If it is still slamming, check the motor or belt for wear and tear. If the belt is missing teeth or motor slams instead of slowly dropping when powered down, a replacement will be needed.
¶ Unknown vs. Unknown Title
These definitions gets mixed up. Both are not the same or have the same meaning.
¶ Unknown
When the camera interface or Cortex processing module fails to decode the barcode symbology, confirm that your HAL XML configuration (hal.xml) specifies the correct device node, scan parameters, and decoding settings. Be sure the device is firmly plugged in to the USB slot on the gripper and appears in Device Manager.
- Camera (3rd/4th Generation)
Please tweak the camera settings in HAL Tester until the barcode is successfully read. Make sure IR lights are plugged into J7 on the gripper board.
If the issue still occurs, you will need to install the 3rd or 4th gen drivers located in the Technician Driver Kit posted in the discord server. - Cortex
This issue is infrequent; occasionally reinserting the disc will resolve it.
If the issue still occurs, you can.
1. Open the Registry Editor and navigate toHKEY_LOCAL_MACHINE\SYSTEM\ControlSet001\Services\CCSERMU\Configuration\000000000000and create a new String Value (REG_SZ) namedPortNameand assign it the dataCOM6. Afterwards, restart the PC and it should start scanning properly.
2. Open HAL.xml and change the COM port forSnapDecodePortto whichever portUSB to Virtual COMis assigned to in Device Manager.
¶ Unknown Title
When the scanning subsystem decodes a Data Matrix code but cannot resolve it to a title record, you will need to use a program to bind the scanned Data Matrix to the proper product entry. Before performing the association, vend the disc(s) from the kiosk and re-insert or restart the Kiosk Engine service to clear the “Unknown Title” state for a specified disc(s).